well! i have certainly made you wait long enough to see my finished dresser-turned-kitchen-island. i didn’t mean to. life got in the way (doesn’t it always). and i was waiting for pictures on the broken computer. and when i got access to said computer, they weren’t there! the travesty. so i’m missing some process shots, but who needs those anyway? the good stuff is the final product shots, right?!
anyway. enough excuses. let’s start from the beginning.
the moment i saw this image on pinterest i had a mission: recreate this for my my one-drawer kitchen.
 {via}
{via}
it took me a few weeks of craigslist stalking, but the perfect kitchen-island-dresser specimen was finally mine.
once home, i removed the drawers and hardware, gave the dresser a light sanding, wiped it down with a tack cloth and began priming. i first used zinsser bulls eye 1-2-3 primer, applied with a foam roller (and brush on detail parts).
the foam roller application left me with air bubbles and i wasn’t happy. it could have been the foam roller i bought, it could have been my technique, but whatever it was, my idea for a smooth, fast application was crushed. i was also seeing an orangey-brown tint come through on certain areas on the top and back. hm. i hoped another coat of primer would fix both issues. i sanded and wiped again and applied another coat of primer, this time with a brush.
she (look at those legs and those curves–totally a she) was starting to look good. until i started to see orangey-brown tint coming through still. i couldn’t figure out what it was, even after googling, and feared that it would come through my color coats. there was minor panicking but then young house love had a perfectly timed post about painting their kitchen paneling and seeing the same tint come through. i didn’t pick up the same primer they ended up using, but i did switch to an oil-based, stain-blocking primer: zinsser cover stain.
 one coat seemed to do the trick. thank gawd.
my next battle was choosing what color. i picked up about 20 paint cards, including turquoise, yellow and orange-red shades (here is where i would insert a photo of my options, but it’s one of the missing photos). after staring at the paint chips in different lights and different times of day for literally an hour or two cumulative (with ryan in the background saying “just pick a color!”) i chose benjamin moore’s tropicana cabana.
before, during and after purchasing my quart i second-guessed myself (i hate making decisions. have i said that before?) but i had to move forward. before taking the plunge and painting i once again sanded my dresser with extra-fine grit sandpaper (220 grit) and wiped it off to ensure a smooth, dust free finish. per the centsational girl’s painting tips i added in some floetrol to my paint to help minimize brush strokes (it did seem to minimize but didn’t eliminate them).
i painted two coats of tropicana cabana (sanding between coats with 220 grit) and followed it up with two coats of varathane’s water-based (not oil-based as it can cause yellowing over lighter colors) polyurethane in a gloss finish (again sanding between coats) for protection since she would be getting a lot of use in my kitchen.
three coats of primer + two coats of tropicana cabana + two coats of poly (and a whole lot of sanding) later i was very proud of refinishing my first piece of furniture and was in love.
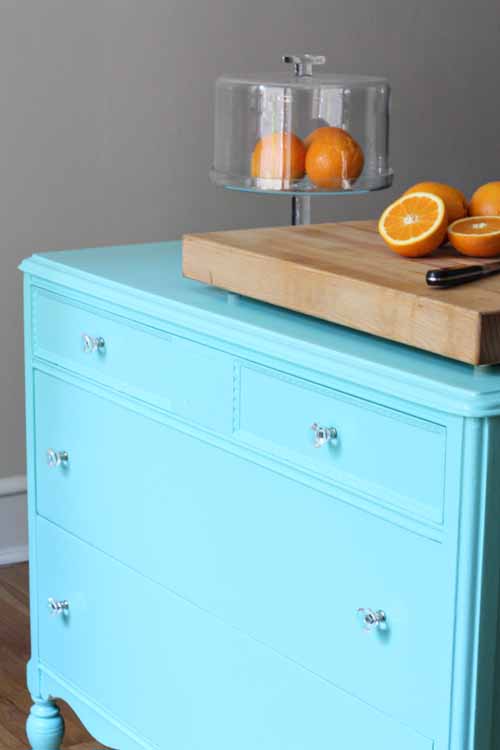
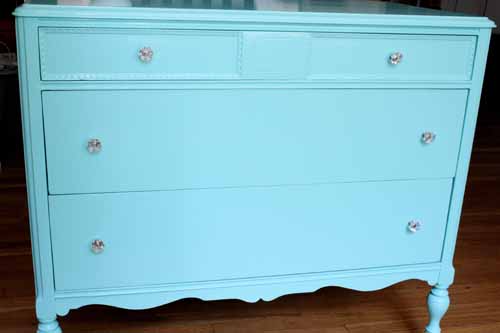
 {this photo is probably the truest to the color}
not too bright, not to light, not too blue.
just right.
the curvy legs make me happy.
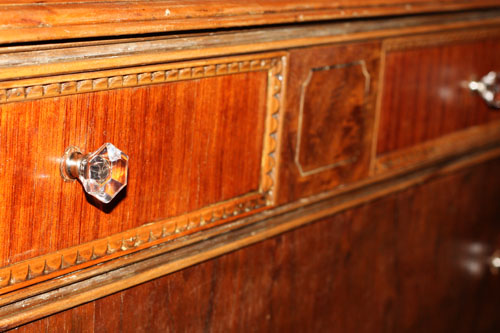
i love the (non original) handles that came with her so they stayed.
so, if you couldn’t tell, the photos above were taken in my dining room since it’s one of the only rooms that gets some sort of natural light at any time throughout the day. here’s the dresser in her everyday role – as my kitchen island.
i think the color works perfect in my kitchen as it brings in some brightness and lightness to an otherwise dark (cabinets and no natural light) and boring kitchen.
i debated installing a butcher block counter top from ikea on the top but instead opted to keep my humongo cutting board on the island for a less permanent solution (as we’re renting and i would like to use this as a regular dresser in the future). it works perfectly as another workspace, and is probably the main workplace now for preparing food. one night both ryan and i were both using the cutting board, each of us on a side, and that was exactly as i had hoped it would be used.
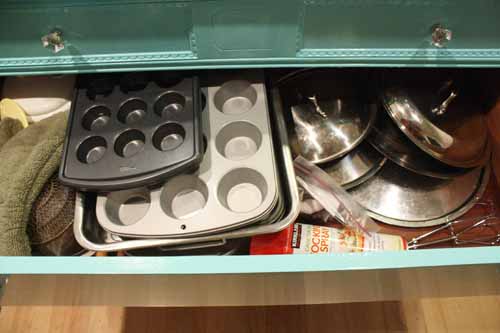
it also provides much needed storage space. here’s a look at what’s hiding in the drawers:
 {dish towels and miscellaneous tools on the left and bags, tinfoil, wax paper etc (and…taco bell sauce) on the right}
(obviously this is real life and not styled)
 {cupcake pans, pan lids and miscellaneous larger items}
 {paper plates and lots of tupperware}
i love it. let’s take a final before/after look.
before:
after:
here’s the breakdown for my project:
dresser: $60
primer: $25 (with 3/4 of a gallon and 1/2 of a quart left for other projects)
sandpaper: $2
tack cloth: $1
paint: $11 (with 1/2 of a quart left)
poly: $10 (with 3/4 of a quart left)
$109 total with lots of primer, paint and poly leftover, or about $79 in actual materials used. not too shabby for a new kitchen island that would have cost me $200-$400 buying one in a store.
love.
{justine}
linking up to primitive & proper, the lettered cottage and remodelaholic


Beautiful!!! I will be attempting this before the snow flies. I felt a little intimidated until I read this – now I am excited.
thanks aunt sue! and, you can totally do it! it just takes patience and a few, simple steps. i’d love to see what you do!
ohhhhhhhhhhhhhh that is so cute! are you going to put hooks and paper towel holder on the side? i love the inspiration. i have one of these at my parent’s house that i could totally do this to (someday when i have somewhere to put it OR in a future baby room). that color is to die for. your place looks adorable. when can you come help me decorate mine? any posts on pillow covers? that is next on my list once the bathroom is done. (yep, still need hardware, light fixture and decorations!)
thanks so much deb! i don’t think i’m going to put anything on the side because this is only temporary for a year or two. i do plan on sewing some pillows soon, but i have to get the fabric first–along with other projects to do. can’t wait to see your bathroom finished–maybe one day 🙂 we’ll have to have everyone over soon to catch up….(and, i’m always in for decorating 🙂
oh my, that is seriously such a good project!! well done!
thank you betsy!
What a fun idea! I love the color too.
I”m your newest follower 🙂
thanks so much suzie! hope to see you around 🙂
that is BEAUTIFUL! love the color, shape, knobs. it is so happy, beachy, eclectic, and pretty! 🙂 thanks for linking to my party!
thanks so much cassie, and thank for the link party! glad i found your blog, i’m a new follower now!
Pingback: it’s good to have a plan b…or e | you're so martha
Absolutely gorgeous!!!! A nice touch of vintage in your sleek kitchen. Perfect!
thanks so much amanda!
Pingback: tv console table refreshed {ahhh} | you're so martha
Love this! You did such a great job. What did you do with the back? I’d really like the back to be functional. Maybe spice racks?
thanks! i simply painted the back along with the dresser. we don’t have a ton of room in the kitchen, so things on the back would have gotten in the way. but i think that could work well! or maybe one of those utensil bars (from ikea) with hooks for utensils and a place for towels.
Pingback: diy kitchen pantry | you're so martha
This is gorgeous! I stumbled upon your link via Pinterest & I too found the above blue island inspiration and have become completely obsessed with doing my own piece. I had actually been scouring Craigslist for a few months looking for a fun dresser to just redo, but then found one finally this week and decided to try and do this! I had also decided I’d just do a large cutting board on top, like you! I love it! I haven’t decided on a paint color, but I started sanding tonight. Thanks so much for the lovely info & amazing photos! You’ve done a great job! This will be my first solo redo of furniture too! 🙂
thanks so much brooke! good luck and let me know how it turns out!
Your dresser/island turned out great! I am looking for a non-cookie cutter solution for my kitchen and I just might try this. 🙂
thanks, kristen! would love to see it if/when you do! it has probably been the best decision for my place so far.
Pingback: The Novice Interior Decorator « Holy Crepe!
Pingback: 20 Ways to Reuse Baby Furniture | Buzz + Inspired
Pingback: 11 Unique DIY Up-Cycled Home Design Projects | Your One Stop Source For San Diego Homes
Reblogged this on River Town Melancholy and commented:
This is simply beautiful. I’m going to borrow some of her moves when I redo my hutch/cabinet, but I know what to do if my son ever kills my kitchen island again now. 🙂
Fabulous!
Thanks!
Pingback: Projecto 31 Dias: Organização na cozinha – dicas | Ideias de Trazer por Casa
Pingback: 7 Kitchen Island Ideas You Haven't Thought Of...
I also used Bullseye 123 on walls and it was a nightmare. It left bumps and lumps and in some spots removed itself. I had to sand the wall down and start over.